
It’s amazing how few bugs we’ve encountered on this trip. However, being bugs, they will find you. So while moored in a slip in Clearwater I began making screens for the four hatches. Scott got the idea from a similar design that he saw on a boat way back in Charlevoix Michigan. It’s a simple design where a fine netting is placed around the outside of the hatch and chain is then sewn along the base to hold the netting down. At least this is the approach I took to making them. I sewed them by hand since I have no sewing machine.
(Above photo is taken from inside the hatch looking out at sunrise.)
The difficult part was accurately measuring how much material to use for each hatch. The sales lady at Sailrite in Ft. Lauderdale and Scott both laughed at me when I said I wanted 3 yards of 45” wide material. How big are the hatches? Well the 2’ square hatch covers are not all that big but when they’re opened up at a 450 angle there is much more area to cover. I had no idea how to measure for this (spatial relationships has always been challenging for me) so I wanted to be sure I had plenty of material. Good news is that this mesh is reasonable... the 3 yards costs $15.
So 3 months later as I sat on deck unfolding the netting, I laid a portion over a hatch until I thought it was fully covered with enough material to fold over the chain. In fact I also laid the chain over the netting and had Scott cut and relink it to fit. When I checked and double checked that I had enough material covering the hatch I marked where to cut the material for one hatch and then did so.
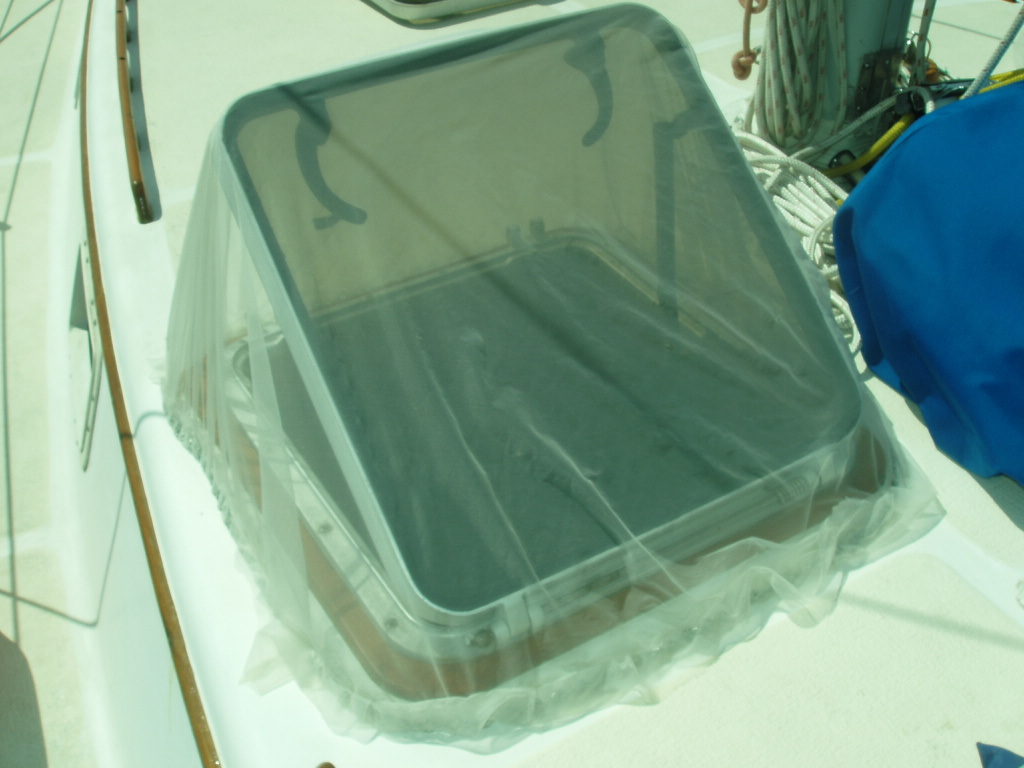
It took between 1.5 to 2 hours to sew all the way around one hatch capturing the chain inside the bottom edge of the netting. I had to fold the material over itself at the corners making sure I wasn’t pulling too much material and shortening it on the other corners. After 2 or 3 stitches I would recheck to make sure chain and material were in the correct position and that the netting would still fit the opened hatch.
This was definitely a custom job. Each cover was unique to each hatch. I soon realized that I needed to not only keep track of which screen went on which hatch but also which corner covered which corner! I drew a black ‘x’ on each starboard aft corner. Of course the screen also has an inside and an outside. They don’t fit inside out.
Interestingly enough I had enough material for only 3 hatches! This has worked out since the forward hatch has a screen that velcros to the inside of the frame. Having the screen inside the hatch allows us to use a windscoop on this hatch which is in the v-berth where we sleep. The windscoop is a story in itself.
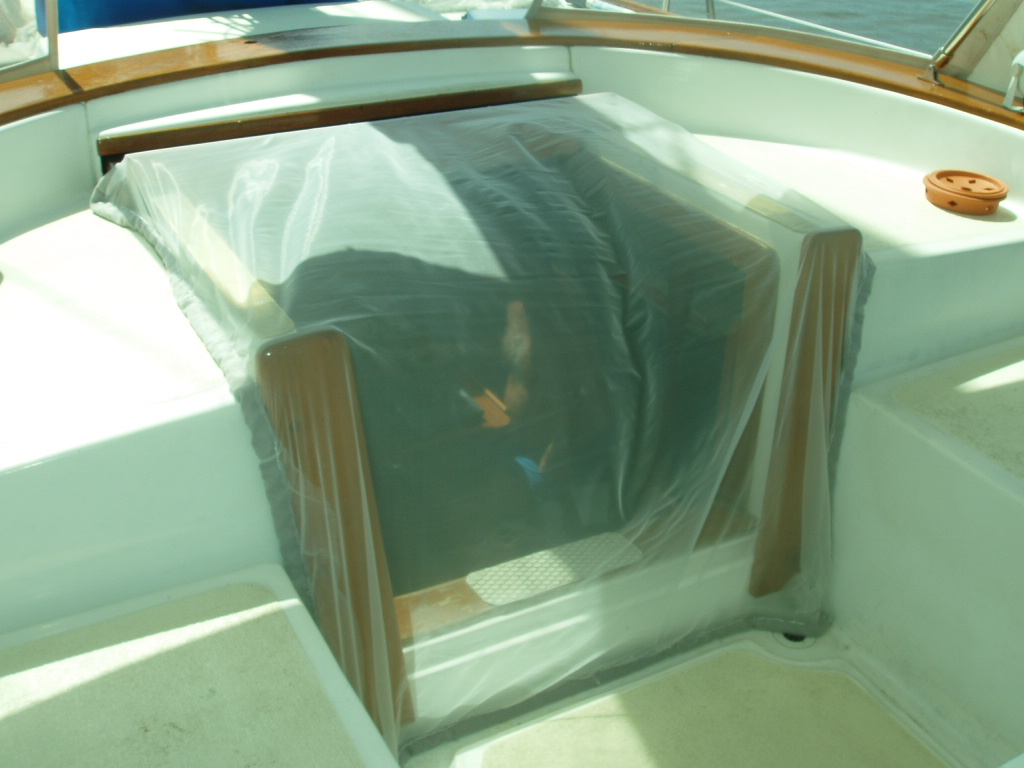
So far they’ve worked well. The mosquitos and other flying creatures can’t come in but the breeze does. There was only one more opening not screened in...the campanionway. Until recently we would put the board in and close the slide cover during the night. This of course cut off much of our air flow and believe me we want all the air flowing possible. The solution - make another screen. I ordered more netting from Sailrite (another 3 yards just to be sure) and received the package at Salty Sam’s marina within the week. Great service. Also as it turned out we had just enough chain left over since I didn’t use any for the forward hatch and I always get extra.
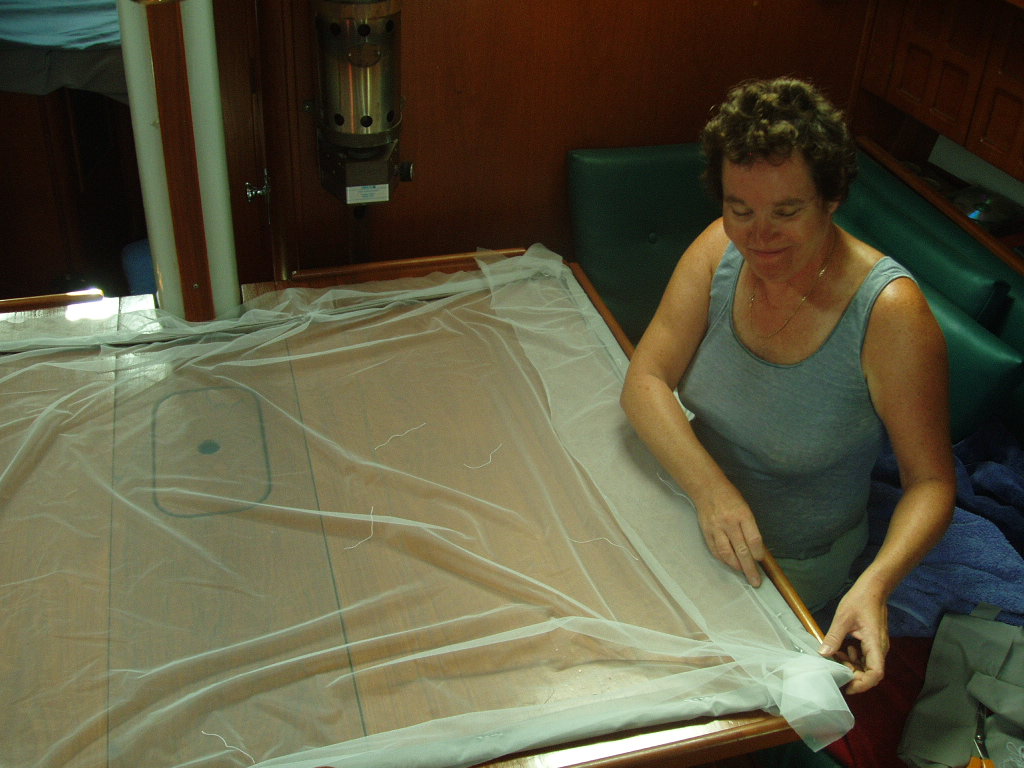
This screen should be a piece of cake. The opening is straight forward...basically an ‘L’ shape. Just cut the netting to fit then sew in the chain. No need to sew at the opening. I had the leisure of sewing at the table in the cabin with the fan on!
So what have I learned since making the first screens and what might I do differently with this screen? Some of the chain is already breaking through the stitches in the original screens so I decided to add a cloth basting to this new campionway screen. This was fairly easy to do since I had the table surface to work on.
My first attempt of attaching the chain and basting to the netting was a disaster. I had a good stitch going through all material knowing I had plenty of material. My only concern was the flexibility of the chain. I didn’t want to capture it in any stitches. I wanted it to move freely within the seem.
 After sewing 2 sides of the screen I realized that I didn’t have enough chain to make it all the way around. What the hell happened? I knew I left way more material for making a hem than I needed but planned to just pull the chain through, pleating the material, to cover the perimeter of the shape. Okay, time to pull. Oh no. Pull as hard as I did, the chain wasn’t budging and the material wasn’t pleating. Too much friction!
After much sweating and swearing and waiting a day, I took out all the stitches and saved the thread and prepared to start over. My second attempt was more successful. Scott connected the chain end to end since we knew it was the exact length we needed for the opening. Then I laid the chain on the basting on the netting on the table, measured and remeasured how long and wide the sides needed to be (44’ x 55) and stitched away. This time it worked.
I still want to add some support to the netting where there is stress at the corners by sewing in a basting. For now we are very gentle when covering and uncovering the campanion way. The netting material if a bit fragile. I
 t has made a difference in our air flow although these past few nights there has been zero air flowing. The windscoop which picks up any particle of wind has been very limp.
So we have managed to keep the bugs out. This new screen also keeps Gracie in! Of course now that she’s blind she’s not quite as adventurous. But she does wait on the top step in the morning for us to open the screen so she can get some fresh air in the cockpit. (By the way she has the best airflow in the cabin. She sleeps in front of her fan on the deck below our bed.) She could easily push the netting and get out but she doesn’t. She probably can’t even see the netting but senses something there so stays on the step. This top step is also her perch for ‘viewing’ the galley in hopes that some treats will emerge. Sometimes she gets lucky! Even a blind cat.......

7 comments:
Those are so awesome!!! I think dad was trying to describe these and I didn't understand. Very clever and awesome that you could just whip them up. nicely done sue!
Sue
As to your struggle with threading the chain through the screen...all I will say is FITEOS!!!!!!!!! :)
Yes. Seamstress I am not particulary the most adept. Thank you Leah for the compliment. Sewing a stitch is always a challenge to me but I can accomplish a few things with thread.
And yes, friction is the enemy of speed! Always a mantra!
Sue
i need to make therse! great idea,but will use lead core braided line from a fisherman pal!Thank you!
Good post. Posts on these type of topics are quite rare. For prevention of mosquito and other insects fibre mesh mosquito screen is enough. It can used with velcro and many other patterns. For preventing birds and other pests it is always advisable to go for ss mesh.
Excellent post and Thanks for sharing the useful information. I'm sure that I will use this for my future.
http://doublepower.nz/
Thanks for sharing this blog, this blog is very helpful information for every one.
Mosquito net for windows
Post a Comment